| |
|
Carmageddon 1:
|
|
|
|
Carmageddon 2:
|
|
|
|
C: TDR2000
|
|
|
|
C: Reincarnation
|
|
|
|
|
|
News:
|
|
|
|
Site
Stuff:
|
| |
|
|
TDR2000 Carskinning Tutorial
|
Step 1: |
|

|
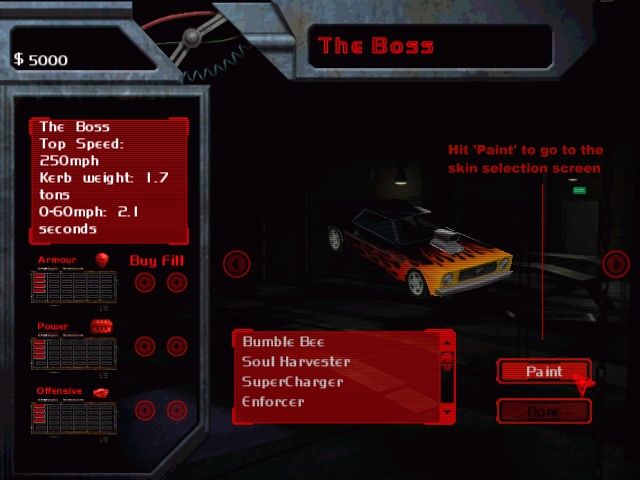
All right, making a skin is quite easy, but it can be tricky at first. I will try my utter best to explain it, and not make simple tasks sound immensely complicated. I thought it'd be best to use an example, so i picked, what i reckon is a rather cool car, the Mustang Boss. On the left you will see screenshots of my actions, click the thumbnails for bigger versions of course. I also added explanations to the screenshots. Right. It's best to go into multiplayer mode and create a server since you have all cars to your disposal, and it's easy to test them. Ok, now go to the car selection screen and pick the Boss, then hit 'Paint' to go to the paintshop/skin selection screen. |
|
Step 2:
|
|

|
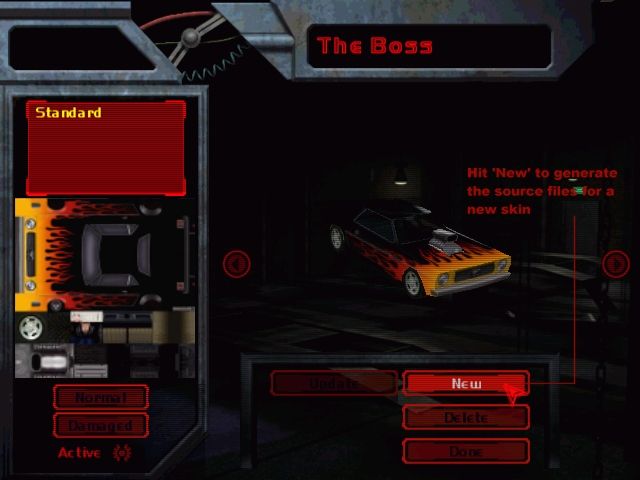
Once there, hit the 'New' button to prepare a new skin (speaks for itself, really). The skin that will be generated will be an exact duplicate copy of the original skin, but TDR2000 will need a name first before it can generate the files. This system allows for multiple skins to be installed at a time and you can easily switch between them no need to mess around overwriting files whenever you want to change the skin, but that's something else I'll get back to the files and selecting your skin later in this tutorial. |
|
Step 3:
|
|

|
You should be prompted for a name for your skin, I chose 'Powerload' in this example. It's very important to get it straight from the first time, because you won't be able to change it later on. Unless you fancy renaming a bunch of files and editing the skin index file. Right. Once you typed in your name and hit enter, TDR2000 will generate a few basic source files, like preview images, the actual skin files, and a skin index file. |
|
Step 4:
|
|

|
There should now be a second skin in the list (don't worry if it's exactly the same as the original). It's best however to Activate this one or otherwise it won't be used in the game. You can always revert back to the original skin by activating that one. (The skin that's activated is the one that will be used in-game). Activate it by making sure your skin is selected (highlighted) and ticking the Active ( ) button in the bottom left corner. Now exit TDR2000. |
|
Step 5:
|
|

|
Right, now let's have a look first at the files. Open Windows Explorer and go to your TDR2000 folder. Now descent into the folders, go in 'ASSETS' then in 'Cars' then to the car you picked, in this case 'Mustang' (Note that the in-game car names and the folder names can be different). Now there should be a 'Skins' folder containing the actual skin files, then there should be a bunch .tx and .tga files which are actually the garage 'preview' images. Then there should also be a carname_texturedescriptor.txt where carname is your car's name (Mustang) which is the skins index file. The remaining files are the original car model files. |
|
Step 6:
|
|

|
Normally you should only have to edit the actual skin files, which are in the skins folder. Open the folder and you should see 2 files carname_skinname_D.bmp and carname_skinname_N.bmp where carname is your car's name (Mustang) and skinname is your skin's name (Powerload). D = the damaged skin and N = the normal skin. |
|
Step 7:
|
|

|
Since you can't paint the skin from within TDR2000 you'll have to do this with any paint program that can handle the .bmp files. I recommend Paint Shop Pro or Photoshop. Open up the carname_skinname_N.bmp (Mustang_Powerload_N.bmp) file and show off your awesome graphic skills… or not. Then save over the file. You should do the same with the carname_skinname_D.bmp (Mustang_Powerload_D.bmp). Although I recommend once you made the Normal skin to edit that one till it looks damaged then use the 'Save As…' option to save it over the Damaged file. I recommend using XenoFex' Crumple plug-in to create the effect. |
|
Step 8:
|
|

|
Now boot up TDR2000 again and go to paintshop/skin selection screen. You'll notice the preview will still be the original skin, this is because TDR2000 doesn't update automatically, so hit 'Update' and then 'Ok' now wait a few seconds. |
|
Step 9:
|
|

|
The skin should now be updated and you should see it both in the preview area and on the car. Now I hear you saying 'Cool, I made this!' hehehe. You can also hit the 'damage' button and update again to see the damage preview and on the car, but this isn't necessary. Now hit 'Done' and check out your car skin in-game. |
|
Step 10:
|
|

|
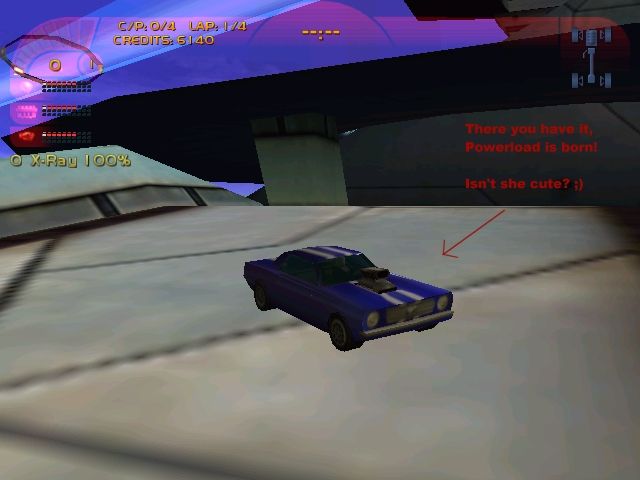
Sweet eh? There, you see, that wasn't too difficult now, was it? As I said before it's best to test your car in multiplayer mode, (you don't need to actually play against human opponents) since you can select any car and track, and muliplayer mode is very light, it outputs a high number of frames per second (smoother game). Meaning you can crank up your video settings (higher resolution or texture detail) so your skin will look even better ;) Anyway happy skinning now!
X-Ray |
|